


Busca "Cuentas y sincronización"
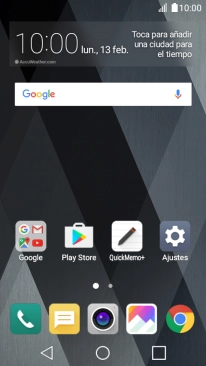
Desliza el dedo hacia abajo desde la parte superior de la pantalla.


Busca "Cuentas y sincronización"
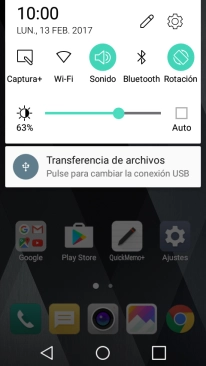
Pulsa el icono de ajustes.


Busca "Cuentas y sincronización"
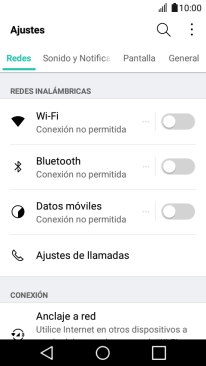
Pulsa General.


Busca "Cuentas y sincronización"
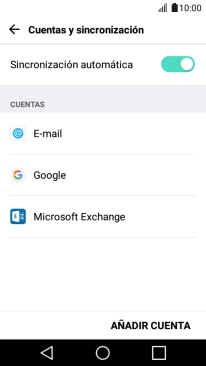
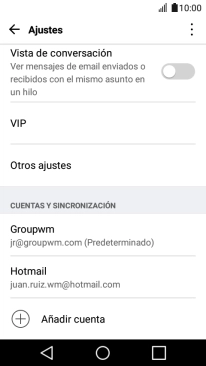
Pulsa Cuentas y sincronización.


Crea una nueva cuenta de correo electrónico
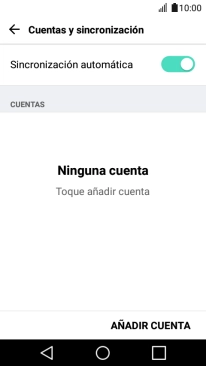
Pulsa AÑADIR CUENTA.


Crea una nueva cuenta de correo electrónico
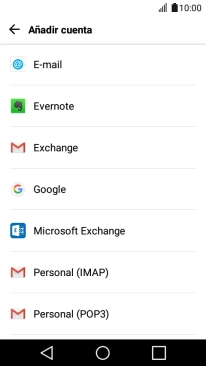
Pulsa E-mail.


Crea una nueva cuenta de correo electrónico
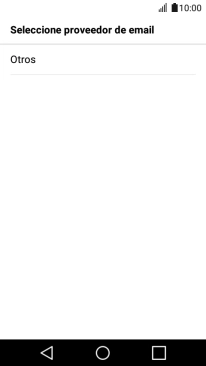
Pulsa Otros.


Introduce la dirección de correo electrónico y la contraseña
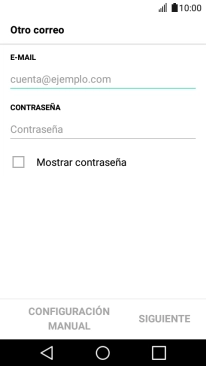
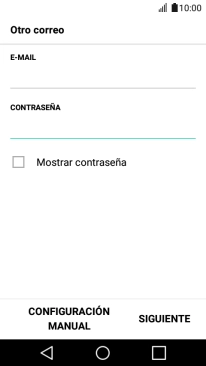
Pulsa en el campo bajo "E-MAIL" e introduce tu dirección de correo electrónico.


Introduce la dirección de correo electrónico y la contraseña
Pulsa en el campo bajo "CONTRASEÑA " e introduce la contraseña de tu cuenta de correo electrónico.


Introduce la dirección de correo electrónico y la contraseña
Pulsa SIGUIENTE.


Introduce la dirección de correo electrónico y la contraseña
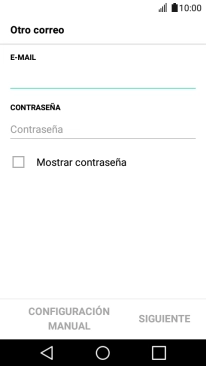
Si aparece en la pantalla esta imagen, tu cuenta de correo electrónico ha sido reconocida y configurada automáticamente. Sigue las indicaciones de la pantalla para introducir más información y terminar la configuración.


Selecciona el tipo de servidor
Pulsa POP3.
Selecciona el tipo de servidor
Pulsa SIGUIENTE.


Introduce el servidor de correo de entrada
Pulsa en el campo bajo "SERVIDOR POP3" e introduce el nombre del servidor de correo de entrada de tu proveedor de correo.


Desactiva la encriptación del correo de entrada
Pulsa la lista desplegable bajo "TIPO SEGURO".


Desactiva la encriptación del correo de entrada
Pulsa Apagado.
Introduce el número de puerto de entrada
Pulsa en el campo bajo "NÚMERO DE PUERTO" e introduce 110.


Introduce el nombre de usuario
Pulsa en el campo bajo "NOMBRE DE USUARIO" e introduce el nombre de usuario de tu cuenta de correo electrónico.


Activa o desactiva la eliminación de correo electrónico en el servidor
Pulsa la lista desplegable bajo "BORRAR DEL SERVIDOR".


Activa o desactiva la eliminación de correo electrónico en el servidor
Pulsa Nunca para conservar los correos electrónicos en el servidor cuando los borras del teléfono.
Activa o desactiva la eliminación de correo electrónico en el servidor
Pulsa Cuando elimino de la papelera para eliminar los correos electrónicos del servidor cuando los borras del teléfono.
Activa o desactiva la eliminación de correo electrónico en el servidor
Pulsa SIGUIENTE.


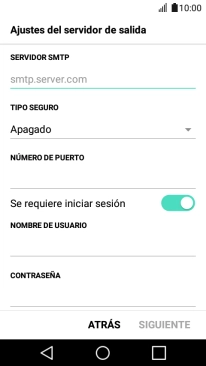
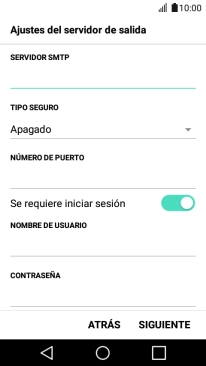
Introduce el servidor de correo de salida
Pulsa en el campo bajo "SERVIDOR SMTP" e introduce smtp.vodafone.es.


Desactiva la encriptación del correo de salida
Pulsa la lista desplegable bajo "TIPO SEGURO".


Desactiva la encriptación del correo de salida
Pulsa Apagado.


Introduce el número de puerto de salida
Pulsa en el campo bajo "NÚMERO DE PUERTO" e introduce 25.


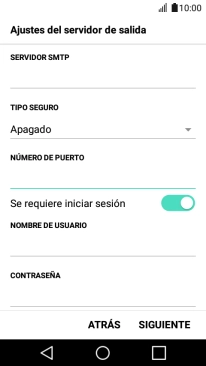
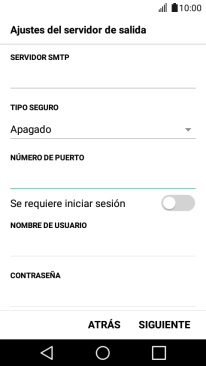
Desactiva la autenticación SMTP
Pulsa el indicador junto a "Se requiere iniciar sesión" para desactivar la función.


Desactiva la autenticación SMTP
Pulsa SIGUIENTE.


Introduce el nombre de la cuenta de correo electrónico
Pulsa en el campo bajo "NOMBRE DE CUENTA" e introduce el nombre de la cuenta de correo electrónico.


Introduce el nombre del remitente
Pulsa en el campo bajo "TU NOMBRE" e introduce el nombre del remitente.


Introduce el nombre del remitente
Pulsa HECHO.


Regresa a la pantalla de inicio
Pulsa la tecla de inicio para regresar a la pantalla de inicio.
Busca "Correo"
Desliza el dedo hacia abajo desde la parte superior de la pantalla.
Busca "Correo"
Pulsa el icono de ajustes.
Busca "Correo"
Pulsa General.
Busca "Correo"
Pulsa Cuentas y sincronización.


Busca "Correo"
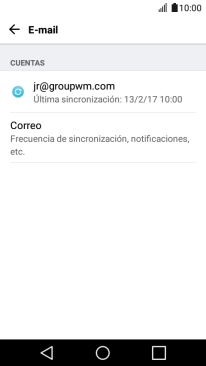
Pulsa E-mail.


Busca "Correo"
Pulsa Correo.


Activa la sincronización de correo electrónico
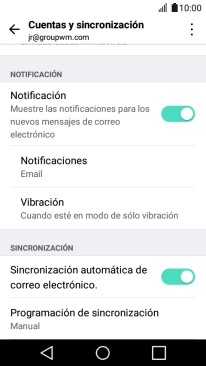
Pulsa la cuenta deseada.


Activa la sincronización de correo electrónico
Pulsa Sincronización automática de correo electrónico. para activar la función.
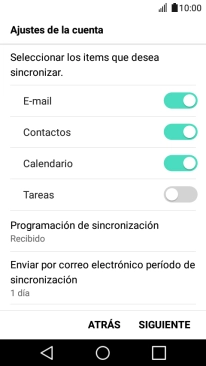
Selecciona el ajuste de la sincronización de correo electrónico
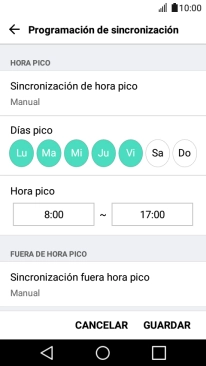
Pulsa Programación de sincronización.


Selecciona el ajuste de la sincronización de correo electrónico
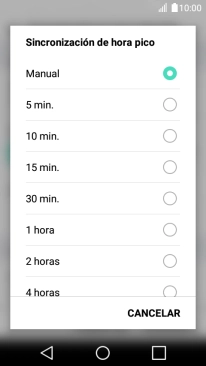
Pulsa Sincronización de hora pico.


Selecciona el ajuste de la sincronización de correo electrónico
Pulsa el ajuste deseado.
Selecciona el ajuste de la sincronización de correo electrónico fuera de las horas pico
Pulsa Sincronización fuera hora pico.


Selecciona el ajuste de la sincronización de correo electrónico fuera de las horas pico
Pulsa el ajuste deseado.
Selecciona el ajuste de la sincronización de correo electrónico fuera de las horas pico
Pulsa GUARDAR.
Regresa a la pantalla de inicio
Pulsa la tecla de inicio para terminar y regresar a la pantalla de inicio.
1 Busca "Cuentas y sincronización"

2 Crea una nueva cuenta de correo electrónico
3 Introduce la dirección de correo electrónico y la contraseña
4 Selecciona el tipo de servidor

5 Introduce el servidor de correo de entrada

6 Desactiva la encriptación del correo de entrada


7 Introduce el número de puerto de entrada
8 Introduce el nombre de usuario

9 Activa o desactiva la eliminación de correo electrónico en el servidor


10 Introduce el servidor de correo de salida
11 Desactiva la encriptación del correo de salida

12 Introduce el número de puerto de salida
13 Desactiva la autenticación SMTP

14 Introduce el nombre de la cuenta de correo electrónico

15 Introduce el nombre del remitente


16 Regresa a la pantalla de inicio

17 Busca "Correo"
18 Activa la sincronización de correo electrónico
19 Selecciona el ajuste de la sincronización de correo electrónico
20 Selecciona el ajuste de la sincronización de correo electrónico fuera de las horas pico

21 Regresa a la pantalla de inicio